Cross stitch looks like a craft that takes years to learn — colorful grids, mysterious symbols, and charts full of numbers. The truth is simpler: if you can make an “X” with a needle and thread, you already know 90% of the technique. Every cross stitch design, from a tiny strawberry bookmark to a full wall hanging, is built from that single X-shaped stitch repeated hundreds or thousands of times. That simplicity is exactly why cross stitch is the perfect first embroidery project for beginners — and why millions of people around the world pick it up every year.
This complete step-by-step guide walks you through everything you need to go from absolute beginner to finishing your first framed piece: the supplies to buy (and what to skip), how to choose fabric and floss, how to read a chart, how to make your first stitches, which beginner patterns to start with, and the common mistakes that trip up nearly every new stitcher. By the end, you’ll be ready to start your first project with confidence.
What Is Cross Stitch and Why It’s Perfect for Beginners
Cross stitch is a form of counted-thread embroidery where you make X-shaped stitches on an evenly woven fabric. The fabric has a visible grid of holes, and each X covers exactly one grid square. Because the fabric does the counting for you, there is no freehand drawing or sewing-machine experience required. You simply follow a chart, which tells you which color goes in which square, and the picture appears row by row.
Compared with other needlework, cross stitch is forgiving. A misplaced stitch can be pulled out in seconds. Projects are portable — you can stitch on the sofa, on a train, or on a lunch break. And the learning curve is genuinely gentle: most beginners finish their first small design within a week. If you’re curious how it compares to related crafts, our article on cross stitch vs needlepoint breaks down the key differences so you can be sure you’re choosing the right hobby.
Cross Stitch Supplies: The Complete Beginner Checklist
You don’t need a big budget to start. A complete beginner kit costs less than a dinner out, and most of the items last for many projects. Here is everything you actually need, with what to buy first and what you can skip:
| Supply | What It Does | Beginner Recommendation |
|---|---|---|
| Aida fabric | Gridded cotton fabric that holds your stitches | 14-count Aida in white or cream, one fat quarter |
| Embroidery floss | Six-strand cotton thread for stitching | DMC or Anchor, 2 skeins per color you plan to use |
| Tapestry needle | Blunt needle that slides through fabric holes | Size 24 for 14-count Aida |
| Embroidery hoop | Keeps fabric taut while you stitch | 6-inch (15 cm) wooden or plastic hoop |
| Small scissors | Trims floss tails cleanly | Any sharp, pointed embroidery scissors |
| A printed chart | The pattern map showing colors and symbols | Start with a free or easy pattern (see Step 5) |
| Needle minder (optional) | Magnetic clip that parks your needle between sessions | Nice to have; any small magnet works |
What you can skip at first: scroll frames, floor stands, specialty lighting, and floss organizers. They are genuinely useful once you’re hooked — but they add cost and clutter before you know whether the hobby suits you. A hoop, a needle, a few skeins of floss, and a piece of Aida are enough to finish your first project.
Step 1: Choose the Right Fabric
Fabric choice determines how big your finished design will be and how easy it is to stitch. For your first project, use 14-count Aida. The “14-count” means there are 14 holes per inch, which gives stitches that are large enough to see clearly and small enough to look neat and refined. You can find Aida in white, cream, and colored varieties at any craft store or online.
Wondering why experienced stitchers talk about “count” all the time? The count directly controls the finished size of your design. A pattern stitched on 14-count Aida comes out roughly 18% smaller than the same pattern on 11-count, and a third larger than on 18-count. Our detailed comparison of Aida 14 vs 16 vs 18 count fabric explains the trade-offs and helps you match fabric to project.
One practical tip: cut your fabric at least 2 inches larger than the design on every side. That extra border gives you room to mount it in a hoop and later frame it without losing any stitches. For example, a 50 x 50 stitch design on 14-count measures about 3.6 x 3.6 inches of stitching — so cut your fabric at least 7 x 7 inches.
Step 2: Pick Your Floss and Needles
Cross stitch thread is called floss. The two brands you’ll see everywhere are DMC and Anchor, and both use a simple numbering system: every color has a unique number, so “DMC 310” is always black and “DMC 666” is always the same bright red, no matter where in the world you buy it. This standardization means a pattern can list colors by number and you can shop with total confidence.
Floss comes in six loosely twisted strands. You almost never use all six — for 14-count Aida, separate and use two strands. If you’ve never separated floss before, our DMC floss guide for cross stitch walks through the numbering system, how to separate strands cleanly, and how to estimate how much thread a project needs.
For needles, buy tapestry needles — they have rounded tips that slip between fabric threads instead of piercing them. Size 24 is the standard match for 14-count Aida. If you later move to 16- or 18-count fabric, drop to a size 26 or 28 needle. A good needle feels smooth through the fabric; if it catches or squeaks, it’s either the wrong size or has a burr.
Step 3: Learn to Read a Cross Stitch Chart
A cross stitch chart is a grid of small squares, where each square represents one stitch on your fabric. Each color in the design is assigned a symbol (like ▲, ●, or ◆) and a DMC number. You’ll also see a color key at the side of the chart that lists every symbol, its DMC number, and sometimes the yardage needed. Reading a chart is a skill you use on every single project, so it’s worth learning properly from the start.
The most common beginner confusion is where to start on the fabric. The usual advice: start in the center of both the chart and the fabric. That way, even if your counting drifts slightly, your design stays centered in the fabric. Count carefully — miscounting by one square is the single most common chart error, and it’s almost always fixable if you catch it early.
If symbols and coordinates still feel intimidating, don’t worry — our guide on how to read a cross stitch chart covers symbols, DMC numbers, grids, and the coordinate systems used by pattern designers, with real chart examples you can follow along with.
Step 4: Make Your First Stitches
Here is the moment everything has been building toward. Follow these five steps and you’ll have a row of neat X’s in a few minutes.
1. Cut and Thread Your Floss
Cut a piece of floss about 18 inches (45 cm) long — longer gets tangled, shorter wastes thread. Separate two strands and thread them through the needle. For an easy start, leave the tail about 3 inches long and hold it on the back of the fabric with your thumb while you make your first few stitches; the tension of the stitches anchors it.
2. Make a Half Stitch
Bring the needle up from the back through the bottom-left hole of your starting square (hole A). Pull until the tail is snug, then push the needle down through the top-right hole (hole B). You’ve just made a diagonal half of an X. This is called a half stitch.
3. Complete the X
Come up through the bottom-right hole (hole C) and go down through the top-left hole (hole D). The two diagonals cross to form a complete X. Always keep the bottom leg of every X slanting in the same direction — for example, bottom-left to top-right — across the entire project. This one habit is what makes finished cross stitch look professionally even.
4. Stitch in Rows for Speed
Instead of completing each X one at a time, stitch a row of half stitches (all the / diagonals), then come back and cross them with the \ diagonals. This “row method” is faster and produces an even tension. Just remember: each half stitch you skip in the middle of a row must be crossed in the same order when you return.
5. End and Start Cleanly
To finish a thread, run the needle under four or five stitches on the back of the work, then trim close. Never knot — knots create bumps that show through and make the back messy. To start a new thread, weave the tail under existing back stitches the same way. If you want to explore beyond plain cross stitches, the basic stitch family also includes half stitches (used for soft shading), backstitch (used for outlines), and French knots (used for tiny dots). Here’s a quick reference:
| Stitch | Chart Symbol | Used For |
|---|---|---|
| Full cross stitch (X) | ▲ ● ■ | Most of the design — color areas |
| Half stitch (/) | ▬ | Shading, sky, background texture |
| Backstitch (—) | Straight line | Outlines, facial features, lettering |
| French knot (•) | ● (in some charts) | Flower centers, small dots |
Step 5: Choose a Beginner-Friendly Pattern
Your first pattern should be small, simple, and colorful. A good rule of thumb: under 100 x 100 stitches, fewer than 15 colors, and made from solid blocks of color rather than heavy shading. Designs like fruits, flowers, small animals, and single characters are ideal because they’re forgiving — a tiny miscount rarely ruins them.
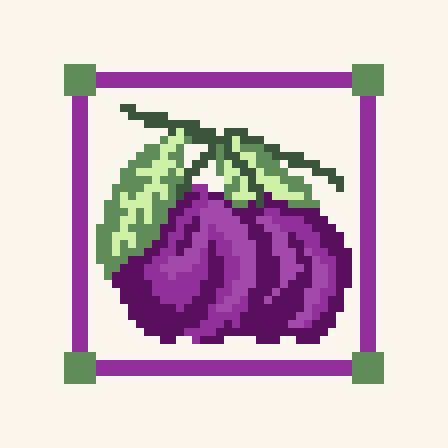
If you want to stitch your first project today, our free mini fruit cross stitch pattern is designed exactly for this purpose: it’s a small fruit design that uses only a handful of DMC colors, comes with a full symbol chart and step-by-step instructions, and it’s free to download. We also offer a whole family of easy fruit patterns with 10–12 colors each if you want to stitch a set.
Another excellent first-project category is flowers. Our roundup of the 10 best flowers to cross stitch for beginners ranks popular designs by difficulty, stitch count, and how forgiving they are for newcomers — including which flower patterns look great even when stitched by a complete beginner. And if you love folk-art style, the beginner’s guide to Chinese paper-cut cross stitch shows how simple bold-color designs translate beautifully into beginner-friendly charts.
Step 6: Avoid These Common Beginner Mistakes
Every stitcher makes mistakes — the trick is to make them once, learn, and move on. Here are the seven most common beginner mistakes and how to avoid them:
- Mixing stitch directions. If some X’s slant one way and others the other way, the finished piece looks messy and catches the light unevenly. Decide on a direction and stick to it for the whole project.
- Using all six strands. Six-strand floss used whole makes chunky, lumpy stitches. Separate and use two strands on 14-count Aida for a smooth finish.
- Knotting the back. Knots create lumps that can push through the front, especially after washing. Weave tails under existing stitches instead.
- Skipping the grid. Counting by eye across a large chart leads to miscounts. Mark the fabric grid with water-soluble pen or pre-gridded fabric to keep count.
- Pulling thread too tight. Tight stitches distort the fabric and leave holes between stitches. The stitch should lie flat on the fabric, not pinch it.
- Starting without checking the center. Locate the center of the chart and the center of the fabric before making the first stitch — it prevents the classic “ran out of fabric” panic at the edge.
- Hopping across the back. Carrying thread across empty areas shows through on light fabric. End the thread and start fresh instead.
Step 7: Finish, Wash, and Frame Your Work
You’ve made the last stitch — but a few finishing steps turn a stitched piece into a keepsake. First, gently wash the finished work in cool water with a drop of mild soap to remove oils and dirt from handling. Rinse well, roll it in a clean towel to remove excess water (never wring), and let it dry flat on the towel. While it’s still slightly damp, iron it from the back with a pressing cloth to flatten the fabric without crushing the stitches.
For framing, the cleanest method is lacing: center the piece on a piece of acid-free foam board, then lace the fabric edges across the back with thread. This keeps the fabric drum-tight without glue or tape. For small projects, a simple hoop frame or a ready-made photo frame with a mat looks just as lovely and takes five minutes.
Where to Find More Beginner Patterns
Once your first project is framed and on the wall, you’ll want more. Beginner-friendly patterns are everywhere if you know what to look for: filter for “easy” or “beginner” in the difficulty, keep the stitch count under 10,000 stitches, and check that the pattern lists DMC numbers and includes a chart with clear symbols.
Seasonal designs are a great way to stay motivated because they give you a natural deadline. Our guide to Chinese New Year cross stitch patterns covers festive motifs — lucky characters, lanterns, zodiac animals — many of which are beginner-friendly single-character designs you can finish in a weekend. And if you’re still deciding between crafts, the cross stitch vs needlepoint comparison will help you understand how this hobby differs from other needle arts before you invest in more supplies.
FAQ: Cross Stitch for Beginners
1. How long does it take to learn cross stitch?
Most people learn the basic stitch in under 30 minutes and finish their first small project (50 x 50 stitches or smaller) in a few evenings. The skills that take longer are rhythm, even tension, and accurate counting — all of which improve with every project.
2. What is the best fabric for a beginner?
14-count Aida in white or cream is the standard beginner choice. Its holes are large enough to stitch comfortably with two strands of floss and a size 24 tapestry needle, and it’s the fabric most beginner patterns assume. If you find 14-count straining your eyes, try 11-count Aida, which has even bigger squares.
3. How many strands of floss should I use?
Two strands on 14-count Aida gives the classic full coverage look. Use one strand for very fine details or on 18-count fabric, and three strands if you want a chunkier, more textured look on 11-count fabric. Separate the strands one at a time before threading — pulling them apart after they’re together tangles the thread.
4. Is cross stitch expensive?
No. A beginner setup — one piece of Aida, a hoop, a needle, and a few skeins of DMC floss — typically costs under $15. A single skein of DMC floss costs about $0.60–$1.00, and one skein is enough for thousands of stitches, so ongoing costs are low. Free patterns (like our mini fruit pattern) let you practice without spending anything on charts.
5. What should I do if I make a mistake?
Mistakes are fixable at almost any stage. If you notice a wrong stitch within a few rows, carefully pull the stitches out with your needle (or a seam ripper for stubborn ones) and restitch. If the mistake is deep in the work, decide whether it’s visible from a normal viewing distance — many small errors are invisible in the finished piece. If you miscounted and the design doesn’t fit, don’t panic: wash and re-blocking can often adjust slight sizing differences.
Conclusion: Your First Project Starts Tonight
Cross stitch rewards patience with a very tangible payoff: a piece of art you made with your own hands, stitch by stitch. Start with 14-count Aida, two strands of DMC floss, a size 24 needle, and a small easy chart. Set up your hoop, make your first X, and let the rhythm of the needle take over. The first project is the hardest — and it’s also the one you’ll remember forever. Happy stitching!